Broadband CPE Scenarios with Mikrotik and DD-WRT
In this lab, you will configure two different sophisticated Customer Presences Equipment (CPE) routers as PPPoE clients in a range of different scenarios. PPPoE is the authentication method most commonly used in ISPs. You will need to work in at least groups of two to complete this activity.
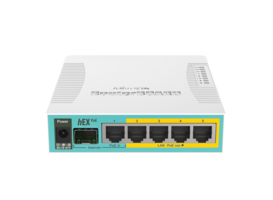
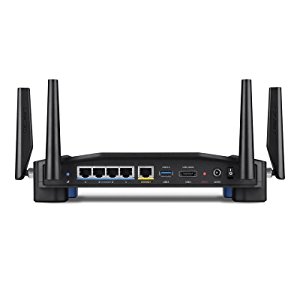
Using the Mikrotik hEX PoE, port 1 will be used as the WAN interface, while ports 2-5 will be the LAN interfaces. The Linksys has an Internet port, with the ports numbered 1-4 being used for the LAN.
Contents
Cabling to the ISP/CCR
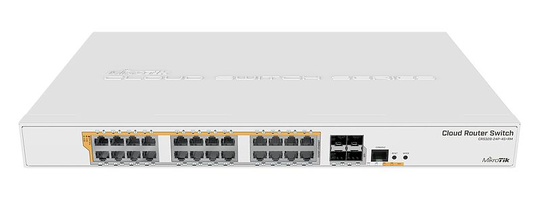
You should connect a cable between your device and the Mikrotik Cloud Core Switch located in the data centre. For the purposes of this lab, the cloud core router will be the ISP and is running a PPPoE server. Use the table below to ensure that you use a unique username and password to authenticate to the Cloud Core Router.
Please be guided by your lab instructor who will talk you through the best way to connect to the data centre.
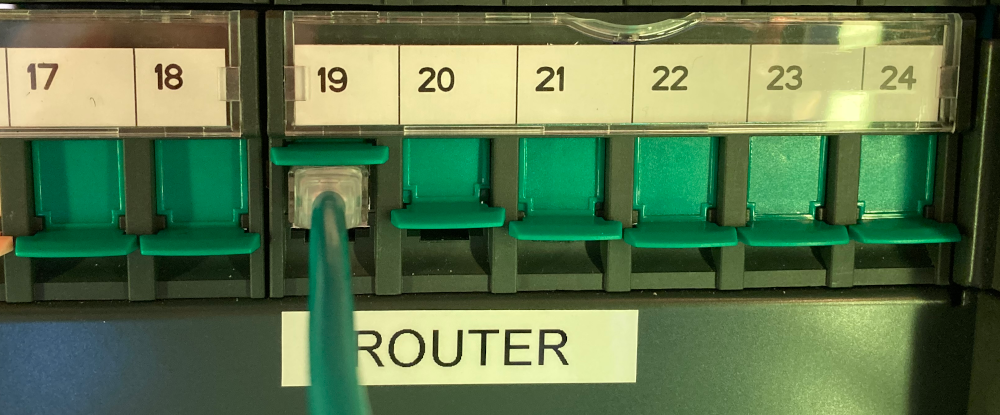
The Cloud Core Switch is shown below, pay attention to the port numbers that you wire up in the data centre. Use the port number in the patch panel in the data centre that you connect to determine the username and password that you use in the table below. This workflow should prevent two groups from using the same PPPoE credentials.
| Pod # | Username | Password | Data Centre Port No |
|---|---|---|---|
| A | alpha | alpha | 17 |
| B | beta | beta | 18 |
| C | charlie | charlie | 19 |
| D | delta | delta | 20 |
| E | echo | echo | 21 |
| F | foxtrot | foxtrot | 22 |
| G | golf | golf | 23 |
| H | hotel | hotel | 24 |
Configuration of the hEX PoE Router for PPPoE
Note that the Mikrotik CCS, has PoE. As there is a copper cable connecting the Mikrotik CCS to the Mikrotik HeX PoE on your desk, cabling the router correctly between the data centre and port the WAN/PoE port on your HeX PoE should turn it on.
Once you have got it turned on, plug a cable into one of the LAN ports and connect to the default webpage at 192.168.88.1 using a web browser. The default username is admin with no password, please keep it this way for lab purposes.
If you can't access the device at this IP address or the default username and password do not work then reset configuration:
- unplug the device from power
- press and hold the button right after applying power, hold the button for 5 seconds (USER LED will start flashing)
- release the button to clear configuration.
Configure PPPoE with the username and password, root and admin below using the simple QuickSet page. Ensure that DHCP Server and NAT check boxes have ticks. Your router should authenticate with the PPPoE server and from your PC you should be able to ping the WAN interface of your Mikrotik ping 100.64.0.x (Where x will be your IP address provided by the Mikrotik CCS.
Examine the status of your PPPoE connection by clicking WebFig->Interfaces. Then click on the interface that says pppoe-out1.
Before moving on spend 5 minutes to have a good look at the features provided. Note the amount of advanced functionality provided.
Does the Mikrotik support:
- BGP
- MPLS
- VPNs
- What else can you see?
Configuration of the Linksys Router for PPPoE
After you have successfully configured the hEX PoE, temporarily disconnect the hEX Poe device from our PPPoE network and move onto the Linksys. Start by plugging your PC into the LAN and connect to the configuration page at 192.168.1.1. If you can't login, then reset by holding down the reset button for at least 10 seconds. If you were able to login, then manually reset the settings at Administration->Factory-defaults. Configure PPPoE with your username and password. This is found under Setup->Basic Setup->WAN Setup.
Examine the state of the connection under Status->WAN.
Reflect on the differences between the Mikrotik and the Linksys. Spend 5 minutes to have a good look at the features provided.
Configuration of a Mikrotik/Linksys CPE scenario
In the following scenario, you have decided that you would like the stability and rich feature set of the Mikrotik, but the wireless capability of the Linksys. You are going to reconfigure the Linksys as an access point only and use the routing/NAT/QoS/Security features of the Mikrotik. In addition to simply desiring the best features of these devices, in many cases, the location of the ADSL, DOCSIS, GPON broadband into the building is not the ideal location to situate the AP. Many APs may be wall or ceiling mounted to improve the RF coverage of the AP so often there are many reasons why small businesses or homes may separate the PPPoE, NAT, Firewall and routing functions of the router from the wireless capabilities of the AP.
Start by logging into your Linksys device at 192.168.1.1. Please keep the username as root and the password as admin.
Under Setup->Basic Setup, you should change the WAN Connection type to Disabled. Change the Router IP address, under the Network Setup header to 192.168.88.2, the gateway should be 192.168.88.1. You should also disable the DHCP server. Then save and apply.
Then, run a cable between the LAN port on the microtik and into a LAN port on the Linksys. Switch you Wired connection on your Desktop PC on and off again to get a new IP address. You should find that you now have an IP address in the 192.168.88.0/24 subnet. You should be able to login to both the Mikrotik at 192.168.88.1 and the Linksys at 192.168.88.2.
Setup the Linksys/DD-WRT AP (SSID, TX Power, Channels)
Before attempting to connect to your AP, you should change the APs SSID. The SSID (Service Set Identifier) is basically a wireless network name. As all of the APs in the room should have the default SSID of dd-wrt, you should change your SSID to ensure that your wireless client actually connects to your own AP, and not your neighbours. To change the SSID click on the wireless tab, change the SSID, save and then apply the changes.
The second thing we will do before connecting our wireless client is to turn the transmission power down to a lower level. The reason we want to turn down the power levels of our APs in the lab environment is to avoid interference with other groups. We suggest turning the power down to 5 mW. Located under Wireless->Advanced Settings->TXpower to reduce interference with other groups and Murdoch's eduroam.
For those concerned about WiFi radiation and lab safety, there is little to no danger in this unit. The equipment uses frequencies in the public or unlicensed portion of the wireless spectrum. One of the reasons these frequencies were picked by the FCC was because they pose the least risk to public health. While no long-term studies can conclusively dismiss that wireless radiation causes harm, we conclude that there is little or no risk in this unit because the levels of power being used, even before we lower the power to 5 mW, is a fraction of the 1 Watt used by most mobile phones.
Another measure we will take to avoid interfering with neighbouring groups is to change the channel from the default. Change the channel/frequency by clicking the wireless tab and change the wireless channel.
Connect to from your wireless computer by clicking network connections in the bottom right corner and selecting your SSID.
On the wired machine that is browsing the dd-wrt configuration page click Status->sys-info and confirm that your wireless client is connected. Work out the IP addresses of the wireless PC and the wired PC. Confirm that they can both ping each other. To do this, click start->run. Type cmd in the box that opens. Then type ping [ip address] [enter]. When both PCs can ping each other. Move on to the next lab.
Security
There are numerous security solutions for wireless LANs, this week we will configure the legacy WEP (Wired Equivalent Privacy) and then the newer and more secure, WPA (WiFi Protected Access).
WEP
To configure a WEP key on the AP click Wireless->Wireless Security. Set the combo box to WEP. These keys can be configured as a pass-phrase which will be converted to HEX keys or, you can just enter a HEX key. Use 64 bit WEP and enter a 10 digit hex key. Save and then apply.
Your wireless client should now be disconnected. You will need to enter the WEP key on your wireless client to connect. You should now be connected using WEP. Confirm this by pinging the wired host. If you are not connected, troubleshoot.
WPA
We will now configure WPA encryption on our wireless system. On the AP, click Wireless->Wireless Security. Set the combo box to WPA2 Personal Mixed and select TKIP+AES. Enter a passphrase. In this case, you can use any ascii characters, save and apply.
You may now be disconnected. Ensure that you type in your new WPA passphrase and click ok. You should now be connected using WPA. Confirm this by pinging the wired host.
Challenge 1: SSH Keys on the Mikrotik HexPoE
Run through the following lab SSH_keys_et_al. When you have finished, see whether you can install your Linux machine's public key on the Mikrotik HexPoE. You should then be able to SSH from your Linux box.
Restore Factory defaults
At the end of every lab you should restore factory defaults. To do this:
- On the Linksys: Administration->Factory Defaults->Yes, apply, ok.
- On the Mikrotik: Quick Set->Reset Configuration


