Roaming
In this lab, you will configure an ESS (Extended Service Set) network. An ESS allows the use of multiple access points acting as a single wireless network. This can be used to extend the reach of a network or to provide more network infrastructure to enhance the performance of the network. Wireless clients should roam between access points. They should transition their association to the AP, offering the best signal strength and signal-to-noise ratio. In a lab environment, the access points will be too close to each other and the overlap between wireless cells will be substantial. We will need to simulate a roam, by removing the power plug from one of the WiFi APs.
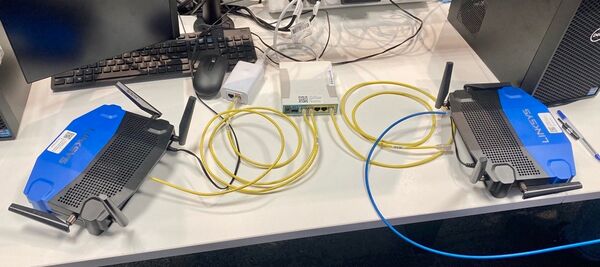
Work together in pairs, or groups of pairs, to configure two APs as one ESS network. Before commencing configuration, decide who will configure each access point. To start, return your access points to factory defaults. Administration ->Factory Defaults.
We are going to implement a network that looks like this:
          +--------+
          | Router |
          +--------+
              |
       +------+-------+
       |              |
  +----+----+    +----+----+
  | Wi-Fi AP |   | Wi-Fi AP |
  +----+----+    +----+----+
Contents
Plan
Before you decide on which channels/frequencies to use, you should examine the current channels in use. To do this, you can use a site survey tool. See below for some software that you can use on your chosen platform. With the new lab setup, the best advice is to open the Windows Virtual machine and inSSIDer is already installed.
- Windows (http://www.techspot.com/downloads/5936-inssider.html)
- Android device (WiFi Analyser: https://play.google.com/store/apps/details?id=com.farproc.wifi.analyzer&hl=en)
- MacOS (See: http://osxdaily.com/2012/07/31/wi-fi-scanner-mac-os-x-mountain-lion/)
- iOS (Network Analyzer Light: https://itunes.apple.com/au/app/network-analyzer-lite-wifi/id562315041)
- Linux (sudo apt install linssid)
Identify the currently least used frequencies in your area, and then mark your preferences on the whiteboard at the front of the room. For the purposes of this lab, we will simply disable the 2.4GHz radio to keep the channel allocation simple, but please think carefully about how you might best use the 2.4 GHz frequency in a crowded RF environment.
Configuration
Computers/lab specific setup
Currently the machines that we use in the labs are Virtual machines that sit within the Standard Operating Environment (SOE) Windows host. For these labs, you should use the Ubuntu OR Windows VM and make sure that your virtual network adaptor is in bridged mode. By being in bridged mode you will be able to obtain an IP address on the 192.168.1.x network and avoid the complications with NAT. You will likely need to make these changes in virtual box and then toggle your network interface, within the VM, down and then up. Remember unless you have an IP address on the 192.168.1.x subnet then you are going to find connectivity in this lab to be difficult.
IP Addressing
By default, both of your APs will have IP addresses of 192.168.1.1. You must change the IP address of one of your APs to 192.168.88.2 and the other to 192.168.88.3. Leave the IP address of your Mikrotik router to 192.168.88.1.
DHCP
Turn off the DHCP server on your access points. Leave it on in your server.
Cabling
Run a network cable between from the LAN side of Router into each of the two wireless APs. The network cable will go between the LAN ports on devices, this will be a layer 2 network.
SSID Configuration
Ensure that the SSID of your APs matches exactly.
Under the Wireless-Advanced Settings tab: TX Power = 10dBm Channel “Save and Apply changes”. Do this for the 5 GHz radio and ensure the 2.4 GHz interface is disabled.
Configure Clients
Configure one or more laptops or mobile phones as wireless clients of your network. Two or three clients should be ample as more will just make it difficult to determine which client is associating with each access point.
Roaming
Monitor the “associations” occurring on each access point Status->sys-info. It will only get association information periodically so be patient.
You will probably find that the client “locks onto” one access point and will not roam, in this case, you may need to or switch the AP off entirely. Try performing a continuous ping from a wired PC. How many packets do you lose when an AP fails and the client is forced to switch between APs. This is an example of a layer two roam, because the device will keep the same IP address. Another benefit is that heavily overlapped cells offer redundancy and fault tolerance.
Questions
- A range of different software packages for different platforms were provided. What would be most convenient for a consultant doing this work day-to-day?
- An ESS must share a common Ethernet Backbone. Why is this necessary?
- Why are channels 1, 6 and 11 commonly used? What WiFi channels did you choose to use?
- What channel does the client use?
- How does a client know/decide which network to associate with?
- This lab exercise is an example of layer ____ mobility?
Final note: To build an EBSS, APs must be in the same IP subnet, they must be connected via switches, they must use the same SSID and careful attention should be paid to channel allocation and coverage.
